


In this watercolor pencil leaf exercise, you’ll draw the same leaf twice. Give both copies the same pencil marks, then touch one with a damp brush. The dry leaf keeps the grain of the paper. In the other, you’ll see how water carries the pigment into the spaces between the strokes. Keeping one copy dry gives you a comparison you can come back to.
What you’ll need
Pick a small leaf with a clear center vein and a simple outline. Set out watercolor paper, a cup of water, a tissue, and one color of Faber-Castell Albrecht Dürer Watercolor Pencil. A small round Marie’s Nylon Paint Brush will help you work near the tip without spreading water past the outline.
How to draw a leaf with watercolor pencil
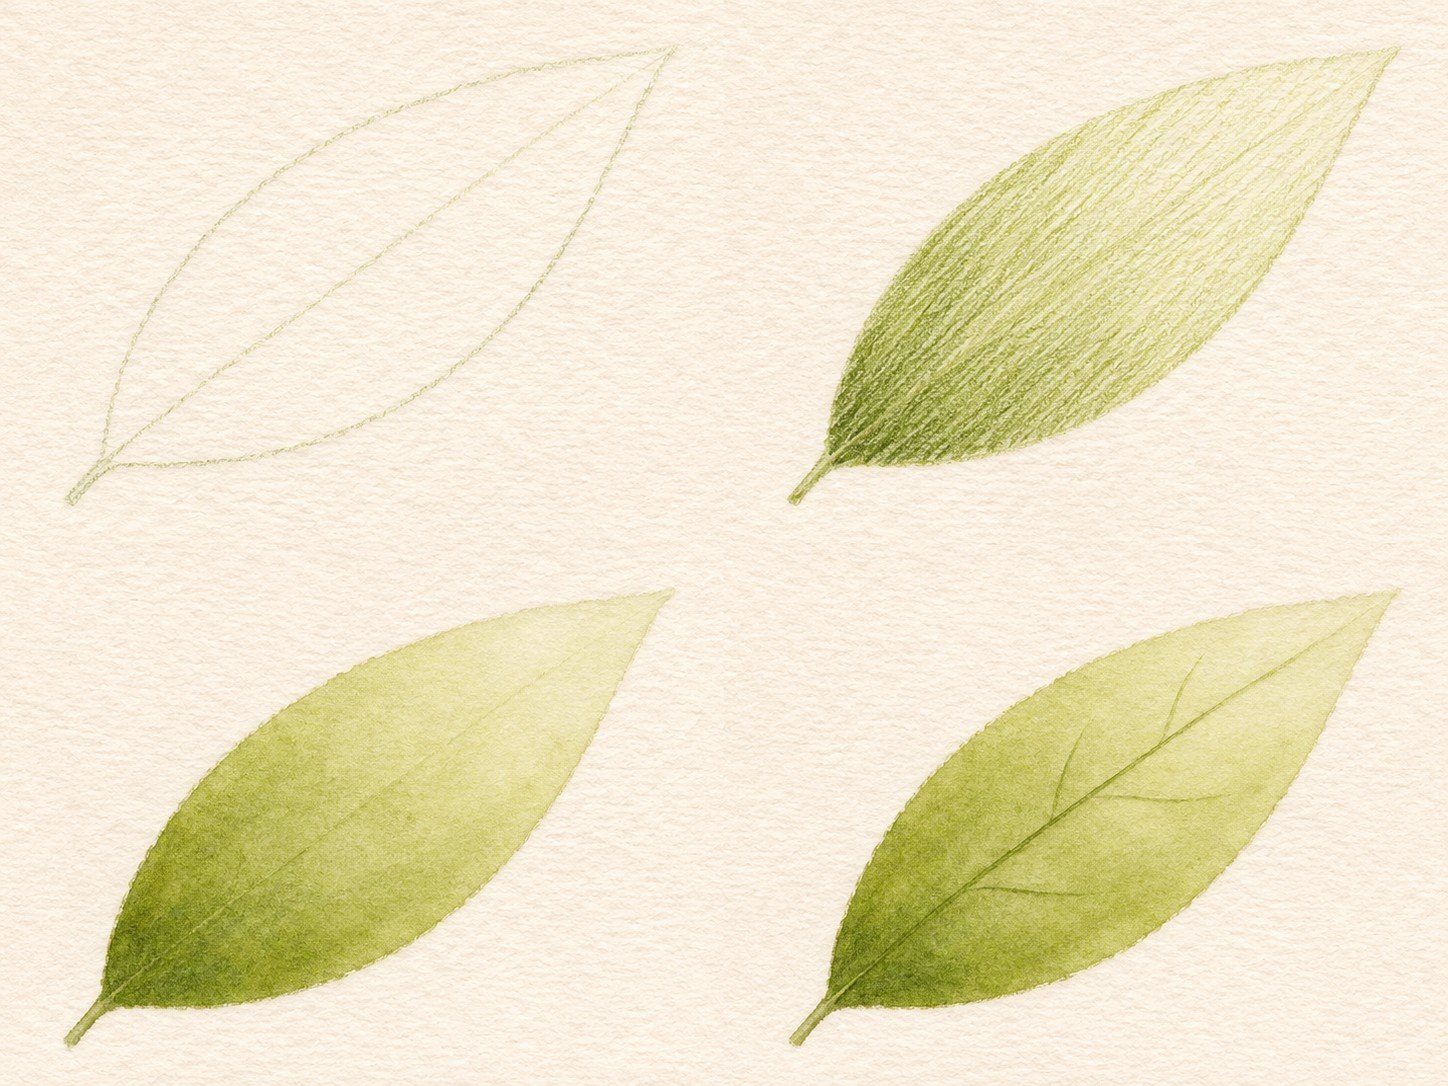
1. Draw two light outlines
Mark the stem and the tip. Join them with two shallow curves, making one side slightly fuller if your leaf is uneven. Add a light line down the middle for the main vein. Repeat beside the first drawing, leaving a gap so water from one study can’t reach the other.
2. Shade both copies with the same pressure
Lay loose, diagonal pencil strokes in both outlines. Use a light touch at the tip and add a second layer near the stem on each copy. Keep the first one completely dry. You’ll use it to see which marks the water changed.
3. Soften the second leaf with a damp brush
Dip the brush in water and touch it to the tissue until it stops dripping. Begin near the pale tip and sweep toward the middle. Rinse and blot before working on the darker base so you can keep the tip light. If water pools, wick it up at the edge with a clean, nearly dry brush.
4. Let it dry, then draw the veins
Wait until the paper is dry to the touch. Go back over part of the center vein with the same pencil, then add a few short side veins. Leave some of the wash untouched so you can see the difference between the soft pigment and the crisp new lines.
Compare the two leaves
Look at the tips first, then the space between strokes near the stem. Which marks stayed visible after the wash dried? On a third leaf, try wetting just one half. The dry marks on the other half can suggest texture while the wash gives you a softer transition.
For another short drawing exercise, try One Mug, Three Pencils.